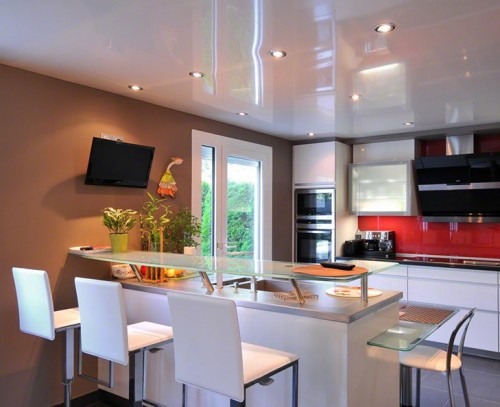
There are two main ways to level ceilings: use building mixtures or mount a plasterboard structure.
If there are no obvious depressions, bulges and serious cracks on the ceiling, then you can use the building mixture and polish the coating. If the ceiling is disfigured by cracks and irregularities, it is easier to mount a plasterboard structure, or change it to a plastic or metal version. Below we describe in detail about these methods of alignment.
For the alignment process you will need:
Necessary materials
Before starting all work, arm yourself with the following tools:
- Falcon plaster;
- Plastic barrel 20 liter;
- Trowel;
- Drill with a power of 600 W and above, a nozzle for mixing mixtures;
- Sponge grout;
- Aluminum rule;
- Comb plaster;
- Grater metal;
- Spatulas with a width of 50, 100 and 200 millimeters;
- Pick.
Ceiling surface preparation
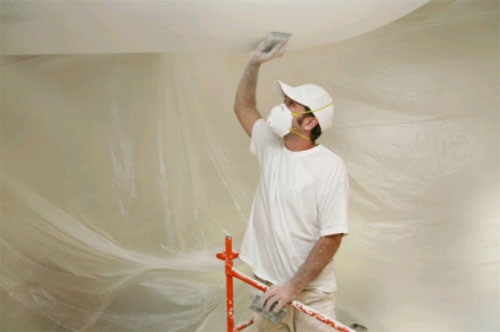
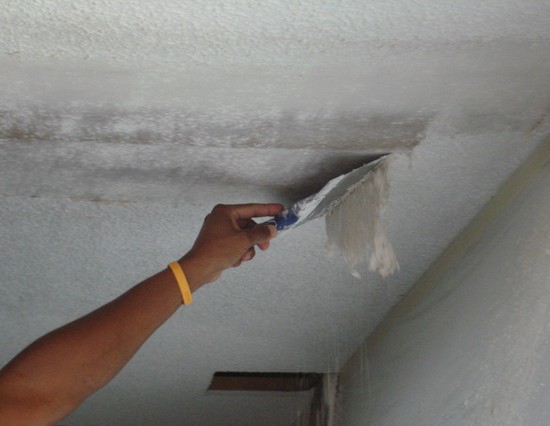
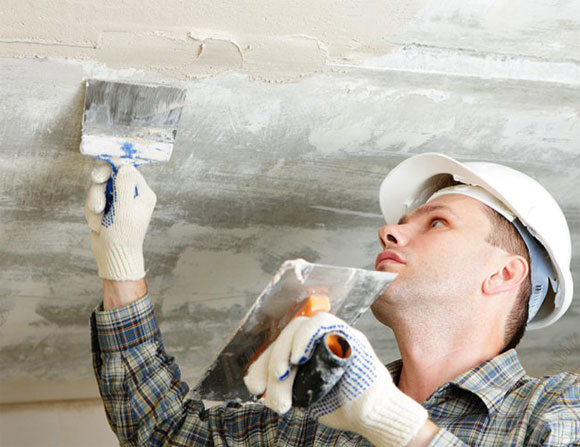
First of all, you need to remove the old finish from the ceiling with a wide chisel or spatula. If there are streaks on the surface, wash them off with a damp cloth. You need to carry out the following steps:
- Clean the surface with a scraper;
- Clean it with a spatula scraper with a bath;
- Use a scraper spatula with a long handle;
- Rinse the ceiling with a stiff brush previously moistened with water.
Leveling steps
To carry out the alignment of the ceiling, you need to go through the following steps:
- to remove the previous coating. Examine in advance the condition of the frame and the layer that levels the ceiling, if installed drywall construction or suspension system;
- Use the level and determine the actual drop of the old ceiling;
- When you have decided on the leveling method, prepare the base. Sweep, sand the ceiling and prime.
Leveling with putty
First you need to prepare the surface. In the event that there are remnants of whitewash or wallpaper on the ceiling, be sure to remove them. Next, embroider the seams that are between the floor panels, the quality of the materials in the seams is quite low. You need to fill the seams with your own materials highest quality, which are durable and reduce the risk of expansion of cracks in the seams.
But before you start, you need to carry out a primer. Use a deep penetration primer. Thanks to this, you will strengthen the base of the ceiling and get rid of gunpowder. Only then can you start filling the joints with putty, using its special type. It is much stronger than the standard, but the price is much higher. In hardware stores there are quality putties for every taste.
Now you can level the ceiling with the initial (starting) putty. If the plates are in different planes, then you need to align all the irregularities. Examine the ceiling and select the tile that is the most recessed inwards. It is with her that you need to start leveling the ceiling. Put the initial putty on it and remove the excess. You need to focus mainly on the plates located on the sides, usually they protrude. Other floor slabs can be leveled by the following method: treat them with putty, take a rule of 2 meters in size and draw along the plane of the surface of the floors that you have leveled before. You need to lead correctly so that one half slides on the plane, and the other on the slab that you are leveling. With this method, absolutely all floor slabs can be leveled.
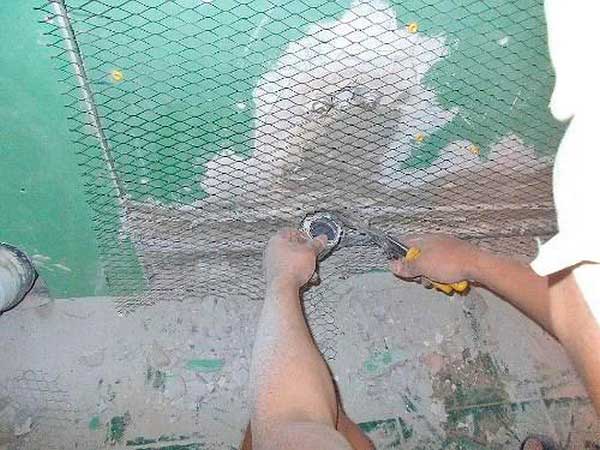
Alignment must begin not only with a recessed slab, but also with a protruding one, this is much more preferable. Next, glue the paint mesh over the seams, thanks to it you will reduce the chances of cracking the seams. The width of the mesh should be at least 20 centimeters, and the structure of the mesh should be coarse. Then you can start plastering the ceiling. This is done after you have applied the starting putty and waited for it to dry. Pre-treat the surface of the ceiling with a spatula. Now you can start applying the finishing putty, remember that you need at least two layers. Apply the finishing putty evenly, otherwise you will have to redo everything. The time has come for grinding, for the procedure you will need sanding paper or a grid. It is still advisable to use paper. Don't forget about the side light, because the surface will lose its appearance after painting or, and you will see some defects.
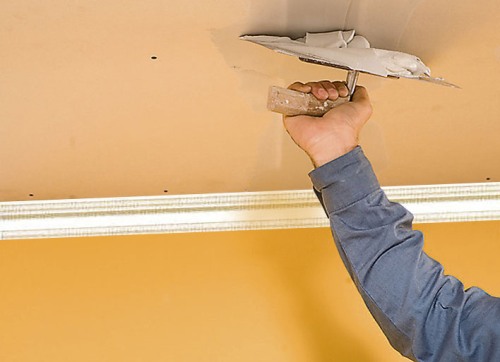
alignment drywall
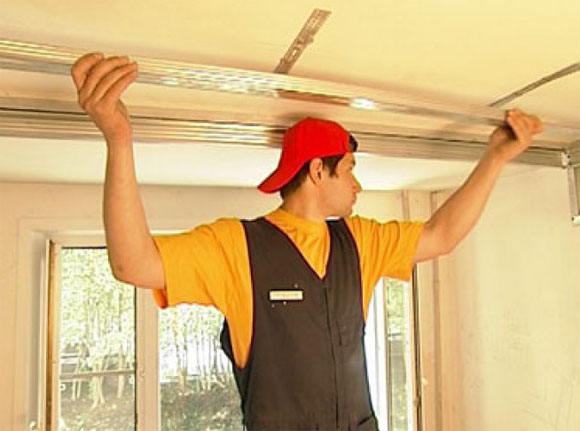
This method is much more preferable, because you do not need to erase the old coating and suffer with plaster. You should also not forget that this is a suspended ceiling, which means that you will hide not only significant surface irregularities of the plates, cracks and their different planes, but also electrical wiring. Use the laser level and mark the starting line at a distance of about 10 centimeters from the ceiling. The line must be drawn around the entire perimeter. Use metal dowels and fasten the guides at a distance of about 40 centimeters from each other.
Plasterboard sheets come in different widths, but 120 centimeter sheets are more common. Draw the lines at half the sheet distance, about 60 centimeters, but remember that the lines must be perfectly parallel. Be sure to leave a small gap for the gaps that you will need for the mortar. Next, fix the metal profiles relative to the lines, do not forget that the dowels must be fastened with a distance of 40 centimeters relative to each other.
Bearing profiles must be fixed to the frame around the entire perimeter. It is necessary to leave small gaps between the guides, then insert them into the suspensions. To connect the profiles to each other, use self-tapping screws. Install them in pairs on both sides of the profile. Mark the longitudinal profiles, but remember that their location depends entirely on the direction in which you will install drywall sheets. If the installation is longitudinal, a step of 40 centimeters is needed, if it is transverse - 60 centimeters.
Engage in cutting longitudinal profiles and install the resulting profiles between the guides with a distance of 50 centimeters from each other. In any case, the length of the profiles will differ, because they are installed in such a way that they do not fall into other fasteners. Use the "crabs" to secure the second tier to the rails.
Then saturate the drywall with a primer (waterproofing). A small distance must be retreated from the wall so that air enters the space without problems between the regular and suspended ceilings. Reinforce sheets along all bearing profiles. It is advisable to use a checkerboard pattern. For fastening, it is better to use self-tapping screws and install them at a distance of about 2 centimeters relative to the profiles. Fill a small gap between the wall and the longitudinal profile with half the sheet.
Seal all joints with a special mixture, and then install a reinforcing mesh on the seams. Align the joints with a spatula and sand them. In the same way, process the remaining gaps and joints.
Video instruction
We recommend watching a video that clearly demonstrates the process of installing drywall on the ceiling.
In more detail about another alignment method - with the help, we will tell you in detail in a graying article. Good luck with your repair!
With the advent of modern technologies for the installation of suspended and tension structures leveling the ceiling with plaster has practically lost its relevance, as it takes a lot of time, effort and money. However, many still prefer this particular type of finish, as the most environmentally friendly and does not affect the height of the room.
If you can’t save time and effort on it with all your desire, then financial expenses can be minimized if you do all the work yourself. This is not an easy task, besides dirty and wet, but if you have made such a decision, our advice will help you avoid mistakes.
Preparatory work
Let's take for example the case with the most difficult initial data: you need to re-plaster an old uneven concrete ceiling with an existing coating and cracks along the junction between the floor slabs.
Removing the old coating
Let's say right away: any old coating must be removed if you do not want the plaster to fall on your head one day. This is a very unpleasant and dirty, but necessary part of the repair.
The method of removal depends on the type of finish:
- Chalk or lime whitewash, gypsum putty is impregnated with warm water to soften using a roller or brush. Then scrape off with an old but sharpened spatula while the coating is wet;
Advice. If the layer of whitewash is thin, it is easier to simply wash it off by changing the water several times.
- Water-based paint is soaked with water with the addition of iodine (10 liter bottle);
- Water-insoluble oil paints and enamels will have to be cleaned “dry” spatula and wire brush. The task will be greatly facilitated by a drill with a wire nozzle or a professional wash - a special tool that destroys the coating. It is applied to the surface with a roller and removed with a spatula after half an hour. The price of such funds is not always humane, but much less time and effort will be required.
- If the ceiling was plastered, it must be carefully tapped with a hammer in order to identify exfoliating areas - they are subject to mandatory removal. To do this, it is often necessary to use an ax, a chisel or a perforator, but the coating that is weakly attached to the ceiling and an area of \u200b\u200b10-20 cm around the unreliable area must be knocked down.
After the complete removal of the old coating, dust, dirt, paint residues remain on the ceiling, so after finishing work it must be washed.
Another important point: make sure there is no mold or mildew on the ceiling. The presence of black and brown-green spots indicates that the ventilation system is broken in the room at high humidity or it does not warm up well in winter. Another one possible reason- frequent leaks from above, from neighbors or from the roof.
It is important! It is useless to fight the fungus if these causes are not eliminated. It will reappear and grow, and this is fraught not only with aesthetic problems, but also harmful to health.
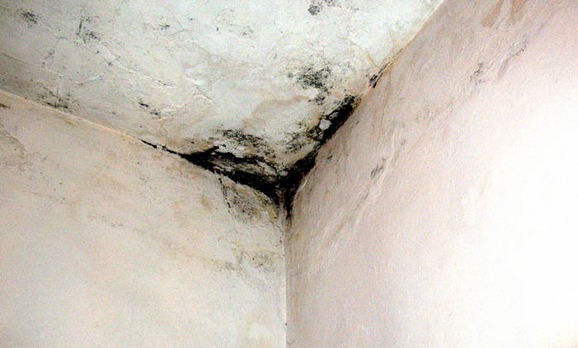
To get rid of mold, it is first mechanically cleaned, after which the affected areas with a large margin around are burned with a gas burner and treated with special antifungal agents.
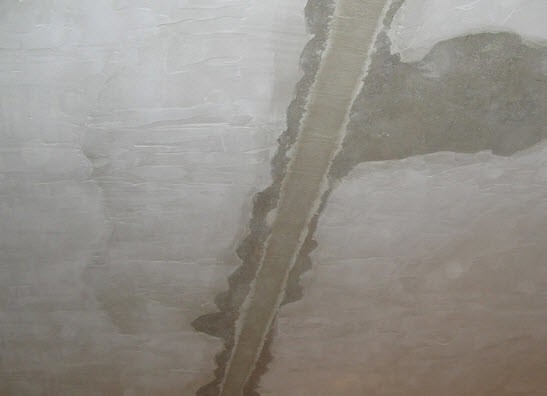
Sealing joints and large defects
Watch the video of leveling the ceiling with plaster before you get started. You can make sure that the preparation for it takes much more time, but not a single step can be neglected, because only the appearance of the ceiling depends on the quality of the finish, but also your safety.
So, the first step is to clean the seams between the floor slabs well and treat them with a primer. The same is done with deep potholes and areas of old plaster that have fallen off.
When the primer dries, make repair plaster:
- Potholes and chips on the surface are sealed with quick-hardening cement putty, filling them up to the plane of the ceiling;
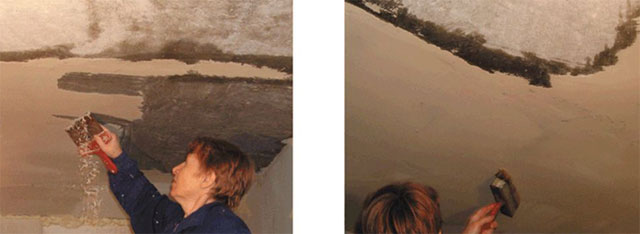
- Joints and large cracks are blown out with mounting foam and, after it dries, the excess is cut off. Or they caulk with tow soaked in liquid gypsum putty. Then a layer of putty is applied to them, a strip of stucco fiberglass is glued to it, which is pressed into the solution with a spatula. The width of the strip must be greater than the width of the slot. Excess putty squeezed out through the cells is rubbed with a spatula along the ceiling.
After that, they wait for the repaired areas to dry out, lightly sand them and carefully treat the entire plane of the ceiling with a primer.
Ceiling plastering technology
Ceilings, like walls, can be leveled with plaster on beacons (see). But this is rarely really necessary: furniture will not stand or hang on it, no one will look at it for perpendicularity to the walls. Therefore, it is quite enough to simply make the surface flat and smooth, without bringing the plane into an ideal horizon.
There is one more reason. The instruction does not allow the application of a thick layer of plaster on the ceiling, which under its own weight can fall off, causing damage to the interior and people in the room.
Therefore, with differences of more than 50 mm and the desire to achieve perfect alignment, it would be wiser and cheaper to make a false ceiling from drywall (see).
The choice of plaster
The choice of material depends on the thickness of the intended plaster coating. Even if you have refused to level, but the ceiling tiles are laid with a significant difference (up to 50 mm) that requires leveling, you will need a coarse-grained plaster for thick layers.
If the difference is small (up to 20 mm) and a simple alignment and elimination of small defects on the plane is sufficient, you can use putty with a smaller grain size.
Note. Aligning ceilings with plaster with your own hands is best done with gypsum-based compositions. They are lighter than cement, have good adhesion, do not crack after drying.
Such mixtures are produced in the form of a dry powder, which must be mixed with water to prepare a working solution. The procedure and proportions of the components are indicated by the manufacturer on the packaging.
For mixing, you will need a bulk container (plastic bucket), a drill with a mixing nozzle and the following information:
- Gypsum compounds set quickly, so the amount of mortar to be mixed should be such that you have time to work it out within half an hour;
- The container, tools and water must be clean, the inventory must be washed after each batch;
- The warmer the water, the faster the finished mixture will solidify. It is best to take water at room temperature;
- After the final mixing, water or dry mixture cannot be added to the solution.
Work order
You need to start working immediately after preparing the solution in order to have time to apply it to the surface within 25-30 minutes. About leveling the ceiling with plaster, the video will tell better than any words, but at some points it is worth focusing.
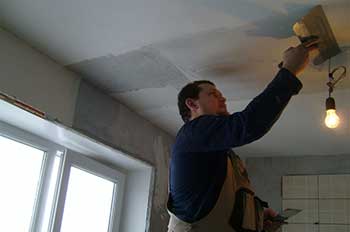
- Coarse-grained plaster is applied with a layer of at least 5 mm, and for putty this thickness is maximum. If necessary, you can do several layers for final alignment, but each previous one should dry well.
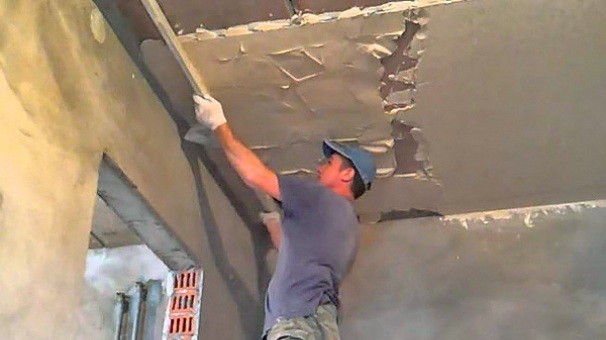
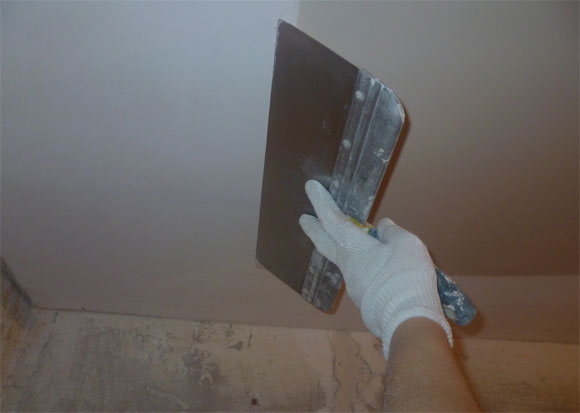
- The solution is applied to a wide spatula and transferred to the ceiling with a movement towards itself, after which it is leveled.
- After applying plaster on an area of 1.5-2 sq.m. it can be leveled with a rule, holding it to itself with a beveled edge. The thickness of the layer will depend on the angle of inclination of the rule to the plane: the steeper it is, the thinner the layer. This angle must be kept constant.
- On the knocks of walls and ceilings, as well as in hard-to-reach places, irregularities are smoothed out with a spatula.
- If for leveling it is necessary to apply a second layer of plaster, then the first, until it is dry, is processed with a plaster comb or a notched trowel to obtain a relief. Or the first layer after drying is impregnated with a primer.
Note. The drying time of the layer depends on the temperature and humidity of the environment. It is impossible to change them artificially with the help of heaters and drafts, otherwise only the surface layer will dry and set, and inside the plaster will remain damp.
After drying, the last layer of plaster is sanded with a grater with a nozzle made of plaster mesh or sandpaper. Such processing is quite enough for the subsequent pasting of the ceiling with wallpaper or ceiling tiles(cm. ).
It is necessary for painting. Gypsum-based Vetonit or Shitrok polymer putty are perfect for this purpose.
Conclusion
Having no experience in plastering, even after studying a lot of materials on the topic and watching the video in this article, you should not take on plastering the ceiling yourself. The slightest non-compliance with the technology can lead to the collapse of the plaster coating in the near future.
This is not only unpleasant, but also dangerous, since even a thin layer of coating has a decent weight and, if dropped, can destroy furniture or cause injury. Therefore, it is better to get the first plastering experience when finishing the walls, and if it is not there, entrust the repair of ceilings to professionals.
1. As you know, the quality of ceilings in our apartments leaves much to be desired. Meanwhile, the ceiling is the most noticeable part of the interior, and from that
how even and solid our ceiling looks, the overall impression largely depends, which can be irreparably spoiled by the difference due to
unevenly laid floor slabs, and simply cracks at the junction of these same slabs. What to do? You can contact a construction company
but their services can cost us a pretty penny, not everyone can afford their services. It remains to do the repair yourself.
How to level the ceiling with your own hands, we will tell in our article.
Ceiling leveling methods
2
. There are two main types of work on leveling the ceiling - using putty and "dry".
The first is the method in which putty is used, as a rule, of two types: starting and finishing. The second is used for rooms with a large difference in ceiling heights or if it is necessary to cover any communications under the ceiling.
If the difference does not exceed 2 cm, it is enough to apply two layers of putty. To level the difference from 2 to 5 cm, you can also use putty, but additional reinforcement is required.
The dry method is used for differences of more than 5 cm. This type includes plasterboard ceilings, plastic panel ceilings and stretch ceilings.
Putty, as a rule, is sold in the form of a dry powder, therefore, in order to start using it, it is necessary to prepare an aqueous solution.
In a container with warm water (the amount of water is determined by the manufacturer and indicated on the package), the powder is carefully poured and mixed thoroughly
construction mixer. If you do not have a construction mixer, you can use a hammer drill with a special nozzle.
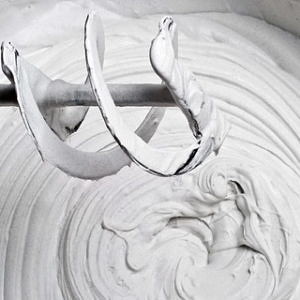
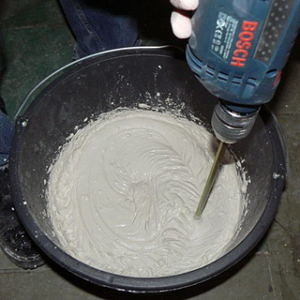
The mixture is thoroughly mixed until a homogeneous mass. After mixing, the mixture should be infused for 15-30 minutes.
You should be aware that the "wet" method implies the mandatory preparation of the base of the ceiling before applying putty. The base is cleaned of dust and dirt
and primed. If there is greasy dirt on the base, they should be removed with a solvent. After the base is ready, apply putty.
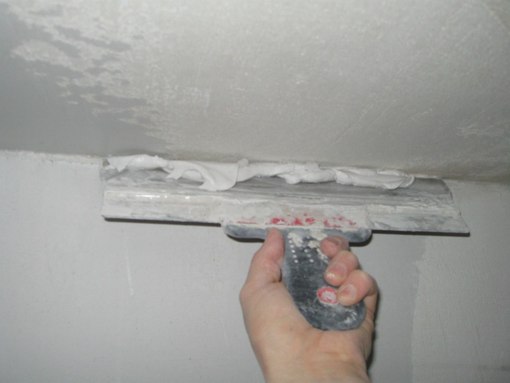
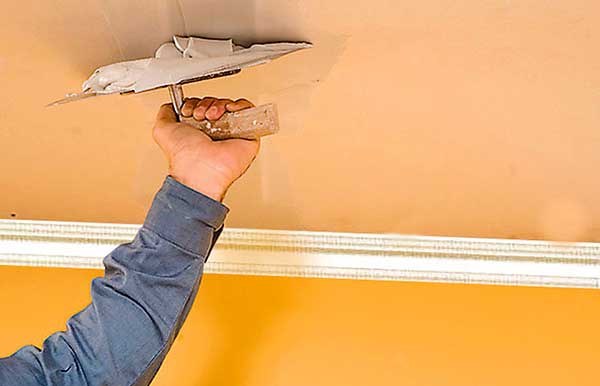
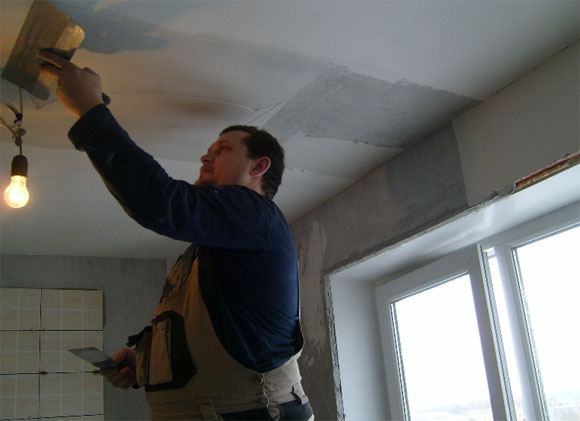
This work is most conveniently performed using two spatulas - a small one (the putty is placed from the container on a wide spatula) and a wide one.
spatula, which is used to level the putty on the ceiling. Putty should be applied with smooth, wide movements. When applying putty,
the spatula is held at an acute angle to the ceiling. Each layer of putty is applied "at a time". putty layer,
applied at one time should not exceed 1.5 cm. If the height difference is greater than this value, then the putty is applied in two stages.
 ceiling putty
 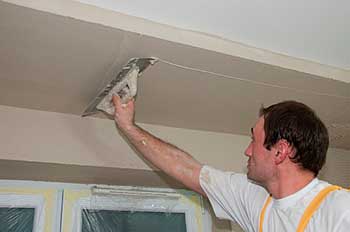 ceiling putty
First, the first layer is applied, it is allowed to dry, after which it is primed. Then the next layer is applied. In addition, as we wrote earlier, if application is required
layer more than 2 cm, reinforcement is required. Reinforcement is carried out using a special mesh, which is glued to the base, or fixed with special brackets.
After the putty dries, it must be sanded, smoothing out all the influxes and drops. To perform this type of work, we recommend using
a puncher with a special nozzle, after which another layer of the same putty is applied - the so-called "leveling" layer.
The better you applied the first layer, the easier it will be to level it.
When the putty dries, the finishing putty is applied. Finishing putty is applied in two layers, with a break of 3-4 hours. Now we give
let the putty dry properly and sand the surface until a perfectly even state is achieved.
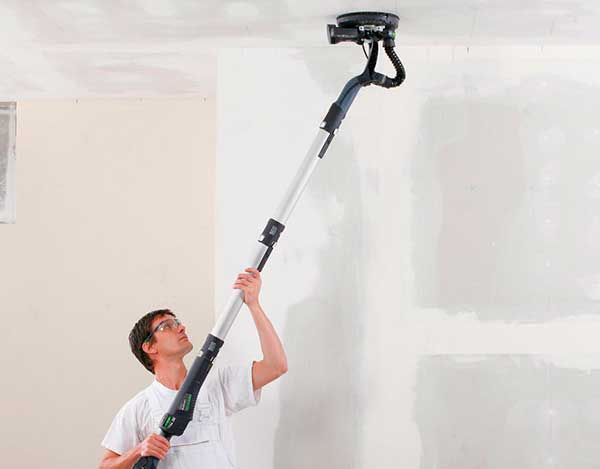
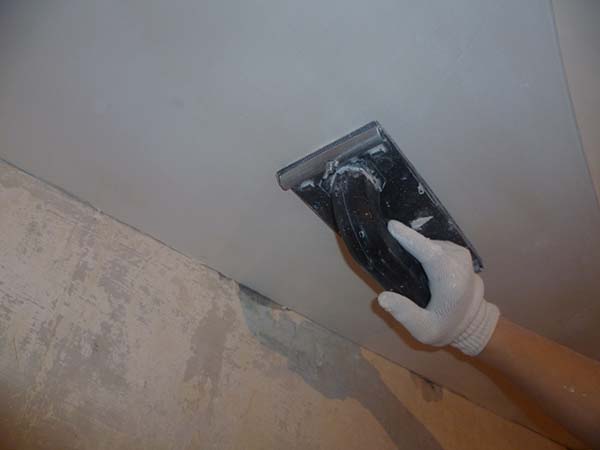
Grinding the ceiling
Grinding is carried out with a sandpaper or a grinding stone, in smooth circular motions.
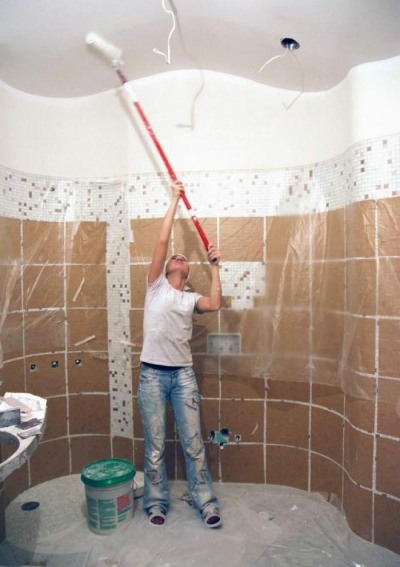
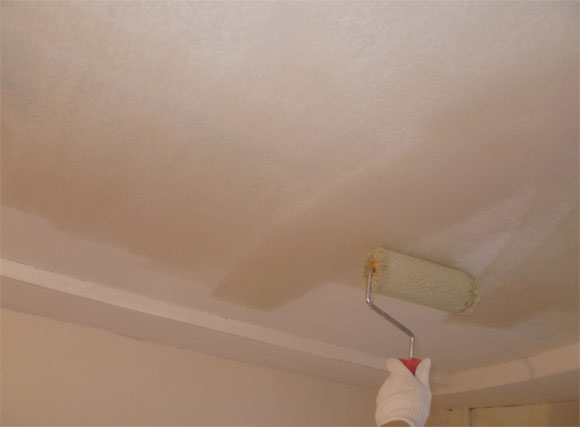
After the surface is sanded, it must be primed. The next day we paint the surface. As a rule, for this
water-based paint is used, white color or some other soft shade.
As for the "dry" methods of leveling the ceiling, the choice of one or another coating depends on the financial capabilities of the owner of the premises.
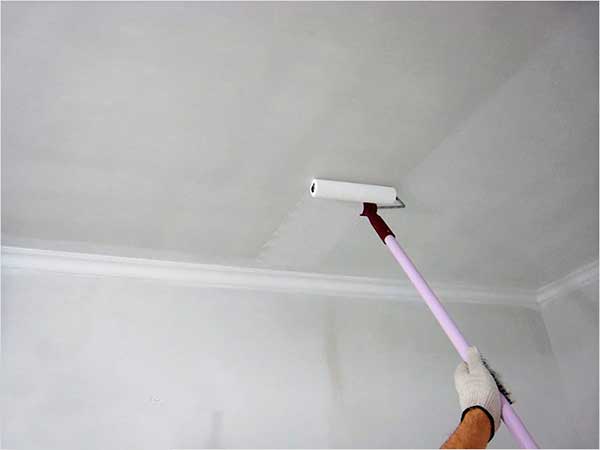
We prime the ceiling
The most budgetary will be the use of drywall sheets fixed on a metal frame. Particular attention should be paid
installation of the frame, since a poorly fixed frame can lead to cracks at the joints of the sheets.
Unfortunately, within the framework of this article, it is not possible to dwell in more detail on the description of each type of "dry" ceilings. But on our site you can find separate articles,
in which the question of how to level the ceiling with the help of plasterboard sheets, plastic panels, stretch ceilings is considered in detail.
Video: How to level the ceiling with putty
Liked? Subscribe to the blog and get new articles!
Currently, cases when the renovation of the premises is carried out independently are quite common. Nevertheless, such a question as how to level the ceiling with your own hands certainly has a place to be, because many do not live in new buildings. There are two main ways to seal the irregularities of the ceiling surface: wet and dry methods.
In the first case, dry materials are consumed, which are diluted with water. The dry method is carried out by attaching plasterboard or plastic panels to the surface. Of course, or plastic has a number of advantages and disadvantages. But it is precisely with these in mind that one should decide on the choice of the necessary method to create the most even surface that looks great on all photos and videos.
Preliminary work
Before you directly level the ceiling with your own hands, you must carefully prepare the base floor.
For this you should:
- To rid the surface of all traces of the previous finish. Using a spatula, remove the plaster layer, and soak the whitewash with plain water.
- Then the surface is covered with a primer mixture in order to make the adhesion of the ceiling and the surface as strong as possible. The primer should be selected taking into account the type of overlap, as well as the level of humidity in the room. So, in bathrooms, you should use a primer mixture with increased moisture resistance.
- Next, apply the baseline with a chocline. This line is very important, because it is from it that the profile structure will be based. In order to outline the baseline, you should mark all the corners in the room, and then use a paint cord to beat off the landmark line.
It should also be noted that when scraping off traces of the old finish, it is necessary to choose the hardest possible spatula or bush hammer. Moreover, such tools can be completely made independently. To do this, cut a standard spatula from 5 cm to 30 mm. This will add the necessary rigidity to the tool. As for the bush hammer, it can be easily replaced with an old ax for cutting meat products.
Required Tools
Thanks to modern technology, you can level the ceiling with your own hands with a minimum set of necessary tools.
So, for work you will need:
Putty application
The final step in solving the problem of how to properly level the ceiling is to apply a second layer of putty, before that it is also worth applying a primer layer. Professionals can apply such mixtures, leaving almost no extra layers. However, when performing the finishing process yourself, you should use a grater or sandpaper to create a perfectly even ceiling.
It should also be borne in mind that the maximum thickness of the putty layer should not exceed 5 centimeters, otherwise the risk that the mixture may fall off increases. That is why, before applying additional layers, it is worth covering the surface with a reinforced mortar or mesh to ensure better adhesion to the base floor.
Marking
After the preliminary work has been completed, it is necessary to apply the markings on which the entire structure will be based. In order to make the most accurate and correct markup, you must use the water level. This tool consists of two vertical tubes that are connected horizontally. To start marking, fill the level with water. Then we recall the laws of physics about two communicating vessels, thanks to which the level in both tubes will correspond.
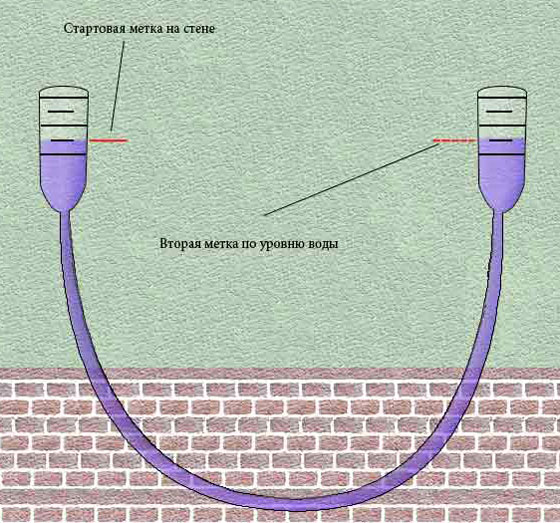
The entire subsequent process should be done in pairs, as one builder marks the required level, while the other moves around the perimeter of the wall in order to apply the appropriate markings. We connect the dots with a single line with a long ruler. The maximum possible deviation should not exceed 5 centimeters.
Installation of lighthouses
The central element in solving the problem of how to level the ceiling with your own hands is the installation of guide beacons, while taking into account:
Priming process
The next step, which explains how to properly level the ceiling, is the application of a primer layer. To achieve the highest quality effect, it is worth letting the primer dry well. If the irregularities of the ceiling reach 5 cm, then plaster should be used, with differences of 4 cm or less, you can purchase starting or finishing putties. The first is used for large irregularities, the second for differences up to 1-2 mm. If the room is different high level humidity, it is necessary to purchase a mixture of cement, as well as treat it with antifungal or antibacterial compounds, this minimizes the appearance of various harmful organisms on the surface.
It is also necessary to determine the maximum allowable layer thickness. With a large thickness, it is possible to use a specialized reinforced mixture. To apply it, you need to purchase a paint grid, which is then attached to the surface using self-tapping screws with large caps. Then plaster is applied over the entire surface of the mesh. If the unevenness is very large, then two or more layers can be applied to create a perfectly even desired result.
As in all previous cases considered, it is necessary to allow each layer to dry thoroughly before applying a new one. At the finishing step, a final thin layer of putty mixture should be applied.
How to level the ceiling with drywall on your own ").
First you need to mark the surface with a water level. At this stage, you should also consider all possible communication systems, namely ventilation and wiring for lighting systems. Based on such structures, the required size of the entire system is determined.
Then guide profiles are attached to the marks made using self-tapping screws. If the standard profile length is not enough, you can connect it with another or purchase a special profile for extension and connection. If the total weight of the structure is large enough, then it will be necessary to purchase suspensions.
As for the types of suspensions, they are:
- Staple. This type consists of a plate, which, using two anchors, is attached to the ceiling. Then the side part of the plate is bent and it is also attached to the profile using self-tapping screws. The profile can be located at a height of up to 12 centimeters from the base floor.
- Adjustable. This type consists of a rod that is attached between the profile and the anchor. This allows you to adjust the height of the structure. For maximum stability of the entire system, the distance between hangers should not exceed 75 cm.
In order to increase the strength of the surface, it is necessary to use transverse profiles. They are fastened by profile connectors, which are located at a distance of no more than 50 cm. During the process of mounting drywall sheets, about three people will be needed. One is holding the sheet while the other two are holding the sheet. All seams between the plates are sealed with putty.
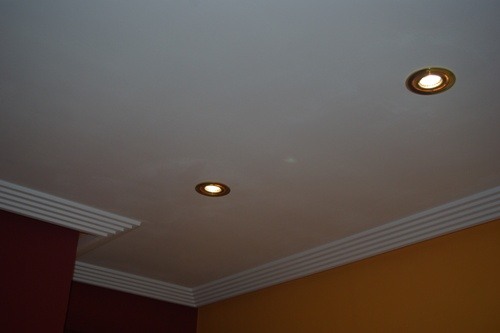
As for the main disadvantage of this design, it is eating up the high height of the main ceiling. However, the advantages are also excellent surface evenness, ease of installation, low cash costs, as well as the possibility of accommodating various communication systems. This type of finish does not leave a large amount of debris, and also makes it possible to create multi-level systems, which increases the degree of uniqueness of the author's idea.
The beginning of any major repairs in the apartment begins with leveling the ceiling. Such work is carried out in several stages.
It should be noted right away that with a capital level of work, it is best for the owner of the apartment to seek help from a specialist.
For those who decide to conquer the “home peaks” on their own, we will tell you how to level the ceiling.
At the end of the article you can see a video example of such work.
The better to level the ceiling. What do you need to work?
Before starting work, stock up on the necessary materials. So, different materials can be used to level the ceiling.
Plaster
One of the most common types of leveling concrete walls today is plaster. They are sold ready-made and dry.
Plaster can even be used to seal deep cracks and chips, defects on the concrete ceiling. This possibility arises due to the fact that the material can be applied in a thick layer on the surface.
putty
The material is sold, like plaster, in dry or ready-made form. Before using a dry substance, it is necessary to dilute it with water; in a thick form, it is ready for application to the ceiling immediately.
This material cannot be applied to the ceiling in a thick layer, the maximum layer thickness should not exceed 1-2 millimeters. If you do not adhere to the specified parameter, then subsequently the primer will crack and crumble.
Putty can only be applied to a smooth coating with minor defects. Often the material is used as a finishing layer, which after application must be sanded. After, the ceiling can be painted.
Drywall
It's cardinal and one of better ways level even the most crooked ceiling. It was this material that made a real revolution in the construction industry, as it makes it possible to obtain a perfectly flat space. Even with strong curvature, it will be possible to align the ceilings to a perfectly even state.
The advantage of drywall is that it can hide even significant irregularities. In technical terms, this material is an overhead space, which is built up on special suspensions. The product allows not only to hide the irregularities of the ceiling, but also to even out the irregularities of the bevel of the ceiling slab.
How to level the ceiling: do-it-yourself work
Preparatory stage
It is impossible to carry out work without preparing the ceiling space. The base ceiling must be cleaned of the old coating, and the old structures (if any) should be dismantled.
After cleaning the surface, you will need to determine the level of the ceiling. Thus, the roughness of the wall will be measured. The information obtained is used to determine the material that will be used to level the ceiling.
How to level the ceiling with plaster
There are two ways to level the ceiling. The first involves the use of a spatula, with which the plaster is applied, and then smoothed out. If the surface is bumpy, then another method is used to level the ceiling with plaster.
Visually, the space is divided into meter squares, metal beacons are set up, plaster is fixed. When the beacons are firmly fixed (the plaster is dry), you can apply the plaster to the designated meter spaces. In this case, the plaster should protrude some distance from the end of the lighthouse.
How to level the ceiling with putty
Before work, be sure to treat the ceiling space with a primer.
This procedure is necessary because it ensures better adhesion of the leveling mixture to the slab, and also prevents the appearance of fungus.
The finished putty will be applied to the surface treated with a primer with a spatula. First, apply a large layer of putty with a narrow spatula, and then level it using a wide spatula.
All movements should be semicircular, the layer of the mixture being applied is controlled by tilting the spatula. Irregularities and excess material are removed immediately. After completing the work with the help of the level, you need to check the evenness of the ceiling.
How to level a plasterboard ceiling
This is the most difficult process, which (if possible) is best left to professionals. First you need to mount the guide profiles to the wall. The central profiles are mounted only after the width of the suspensions has been calculated, and they themselves are mounted to the ceiling.
The profiles should run crosswise in the center of each of the drywall sheets. It is also necessary to mount the inter-sheet profiles in such a way that two consecutive sheets are attached to one profile.
Dowels are used to fasten profiles and suspensions, while profiles are fixed to each other with self-tapping screws, as well as drywall sheets with a profile.
The distance between the base ceiling and the drywall is determined depending on the surface roughness and plane of the ceiling slab and its side bevels.
It is necessary to finish drywall only after the sheets are firmly mounted to the structure. First, the joints between the sheets are processed, and after that the drywall itself.
All work must be carried out carefully and accurately. Only in this case, you can count on an excellent result.